
Are you ready to transform your living space into the sanctuary of your dreams? Whether you’re looking to create a cozy nook for relaxation or an inspiring workspace that fuels your creativity, designing the perfect room can feel overwhelming. But fear not! With Planner5D, bringing your vision to life is as easy as clicking a button. In this step-by-step tutorial, we’ll guide you through the exciting journey of crafting your dream room from scratch—no design experience required! Get ready to unleash your inner designer and watch as ideas turn into reality, all while having fun along the way. Let’s dive in and start creating a space that reflects who you are!
Creating an account and selecting a plan
Getting started with Planner5D is simple. First, visit the website and click on the “Sign Up” button. You can choose to create an account using your email or social media profiles. The choice is yours. Once you’re registered, you’ll be prompted to select a plan. Planner5D offers various options, including a free version that’s perfect for beginners. If you’re looking for advanced features, consider upgrading to a premium plan. Each option has its benefits. The free version provides essential tools while the paid plans unlock additional capabilities like high-quality rendering and access to exclusive design assets. Take your time exploring these choices as this step sets the foundation for your interior design journey. Whether you want to experiment casually or dive deep into complex projects, there’s something here for everyone.
Choosing the layout and dimensions of the room
Choosing the right layout and dimensions for your room sets the foundation for an effective design. Start by considering how you plan to use the space. Will it be a cozy reading nook, a vibrant living area, or perhaps a functional workspace? Next, measure your room accurately. This includes not just length and width but also height if you’re thinking about vertical elements like shelves or artwork. Use these measurements to create a scale model in Planner5D, ensuring every inch is accounted for. Think about flow and accessibility as you sketch out your layout. Furniture placement should promote movement while optimizing functionality. Avoid overcrowding areas; leave enough space to navigate comfortably. Experiment with different shapes and arrangements until something clicks. The perfect configuration will enhance both aesthetics and practicality in your dream room design!
Selecting furniture and decor from the library
Once your room layout is set, it’s time to bring it to life with furniture and decor. Planner5D offers an extensive library that caters to all styles and preferences. Start by browsing various categories. Whether you prefer modern minimalism or classic elegance, there’s something for everyone. You can easily filter options based on style, color, or function. Drag and drop pieces into your design effortlessly. Experiment with different arrangements until you find the perfect fit. Don’t be afraid to mix textures and colors; this is where personality shines through. Consider functionality along with aesthetics. Make sure the pieces not only look good but also serve a purpose within the space. The right decor elements add warmth and character too; think artwork, plants, or rugs that tie everything together beautifully. This step transforms your vision into reality in a fun way!
Customizing colors, textures, and finishes
With your room layout in place, it’s time to infuse personality through colors, textures, and finishes. Planner5D offers an extensive palette that allows you to explore various shades from bold hues to soft pastels. As you select colors for the walls or furniture pieces, think about the mood you wish to create. Cool tones can evoke calmness while warm shades energize a space. Textures play a crucial role too. Mixing materials like wood, fabric, and metal adds depth and interest. Imagine plush cushions against sleek surfaces or rustic wooden accents alongside modern decor. Finishes can enhance your design further. Matte paints offer sophistication while glossy surfaces reflect light beautifully. Experiment with different combinations until they resonate with your vision. This is where your creativity shines—so don’t hesitate to make daring choices!
Adding lighting and other design elements
Lighting plays a crucial role in any room design. It sets the mood and highlights your favorite features. With Planner5D, you can easily explore various lighting options. Start by selecting overhead fixtures that complement your style. Whether it’s modern pendant lights or classic chandeliers, there’s something for everyone. Don’t forget about task lighting—think floor lamps or sconces near reading areas. They add functionality while enhancing aesthetics. Incorporating natural light is equally important. Use virtual windows to simulate daylight streaming into your space, making it feel warm and inviting. Next, consider decorative elements like plants or artwork to bring life to the room. These finishing touches make a significant impact on overall ambiance and personality. Experiment with different arrangements until you find what feels right for you. Remember, every detail counts in creating a harmonious environment that reflects your taste!
Previewing and adjusting the design in 3D mode

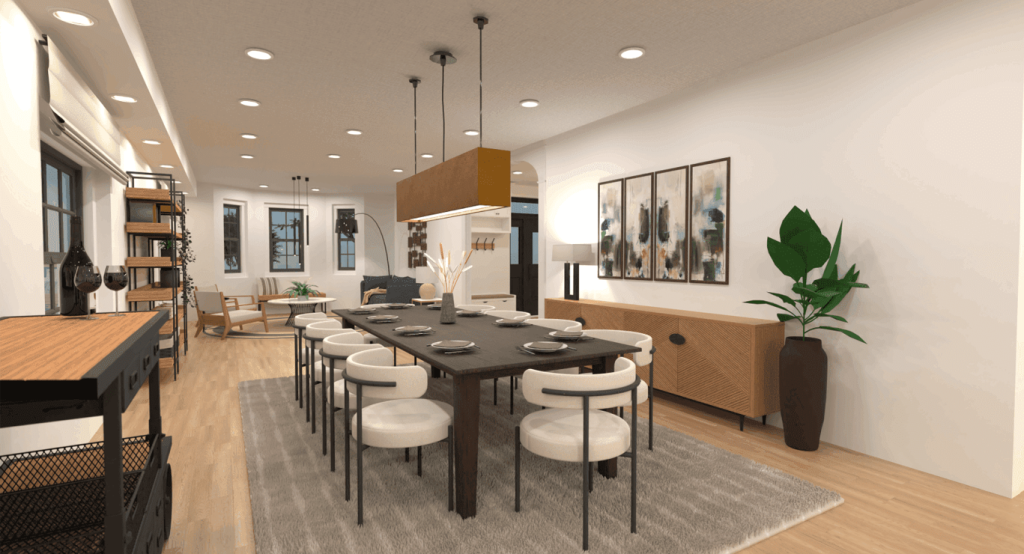
Previewing your design in 3D mode is where the magic happens. It transforms your flat layout into a vibrant, life-like representation of your dream room. With just a click, you can step inside your creation. This immersive experience lets you see how colors and textures work together. You might discover that those vibrant wall hues look different with furniture placed nearby. Adjustments are easy to make in this mode. If something feels off, simply tweak the placement or swap out items from the library until everything aligns perfectly with your vision. Don’t forget to utilize various angles while previewing. Exploring each corner can reveal details you may want to refine further. This stage allows for creativity without limits. Embrace it fully as you fine-tune every aspect of your space until it reflects exactly what you’ve dreamed of creating!
Tips for creating a cohesive and functional room design
Creating a cohesive room design requires thoughtful planning. Start by selecting a color palette that resonates with you. Choose three to five colors that complement each other well. Consider the flow of the space. Arrange furniture in a way that encourages conversation and movement. Ensure pathways are clear, making it easy to navigate the room without obstacles. Incorporate various textures to add depth and interest. Mix materials like wood, fabric, and metal for an inviting atmosphere. Balance is key; avoid overcrowding any single area with too many items. Don’t forget about functionality. Each piece should serve a purpose while contributing aesthetically to your vision. Think about storage solutions that maintain order without compromising style. Lastly, keep your personal touch front and center. Use decor pieces or artwork that reflects your personality—this will make the space feel uniquely yours.